The wall looked almost shy about it at first. A faint yellow halo behind the living-room radiator, nothing dramatic, just a little stain that the owner brushed off with a joke about “old Parisian charm.” Two weeks later, the charm had turned into a dark oval patch with a suspicious furry edge. The kind of thing you no longer unsee when you sit on the sofa at night.
He tried the classic panic combo: bleach, rubber gloves, windows wide open. The smell clung to the curtains, the stain came back within days. This time, a bit larger, a bit bolder, as if mocking his efforts.
When the painter arrived, he didn’t even flinch. “Put the bleach away,” he said. “That’s not how you win this war.”
His method was almost disarmingly simple.
And it changes everything.
No more toxic fumes: what painters really do against damp
The first thing every professional decorator will tell you when they see a damp stain is almost always the same: stop attacking the symptom. Damp is rarely just a color on the wall. It’s a message. A hallway that smells slightly earthy after the rain, wallpaper that curls just at the bottom, black dots that regroup in the same corner every winter.
Once you notice it, you start spotting the pattern at friends’ houses too. One bathroom with a window that never opens, one bedroom wall forever “a bit cold,” the north-facing room with that persistent shadow. Damp always leaves a small breadcrumb trail, long before the mold appears.
Take this small suburban apartment a painter told me about. Third floor, no balcony, bathroom in the middle with no direct window. The tenant spent months spraying bleach and buying “mold killer” from the supermarket, wiping, scrubbing, even repainting with a random white. The patches kept coming back around the mirror and above the shower tiles.
When the painter finally came, he didn’t bring a magic product. He brought a small hygrometer and a flashlight. He checked the ceiling, pipes, and ventilation grille. Humidity level? 78% after a normal shower, and the grille was practically cemented with dust. The wall wasn’t “dirty”. It was suffocating.
Bleach gives that intense feeling of doing something radical. The smell, the sting in your throat, the white foam on the sponge. It feels like war. Problem is, it mostly burns the visible mold on the surface and often damages the paint or plaster below. Ammonia is even worse in a closed bathroom or bedroom.
Real painters learned this the hard way on long-term jobs. When they repaint after a classic “bleach clean,” stains often bleed back through the new coat. The damp is still there, quietly sitting inside the wall. *The real fight is against moisture and porosity, not just color.* That’s why their favorite tools have less to do with chemistry and more to do with patience, airflow, and the right layers.
➡️ If your clothes fade too fast, this washing detail is often ignored
➡️ The surprising reason your toothpaste isn’t working as well as it used to
➡️ Over 65? This overlooked routine helps prevent sensory overload
➡️ Goodbye to blackened grout: the quick hack, no vinegar or bleach, for a spotless tiled floor
➡️ Meet the K-222, the fastest nuclear submarine in history, capable of exceeding 80 km/h
The painter-approved method: treat the wall like a sponge, not a crime scene
Here’s the simple routine many pros now swear by, especially in homes where kids sleep a few centimeters from those walls.
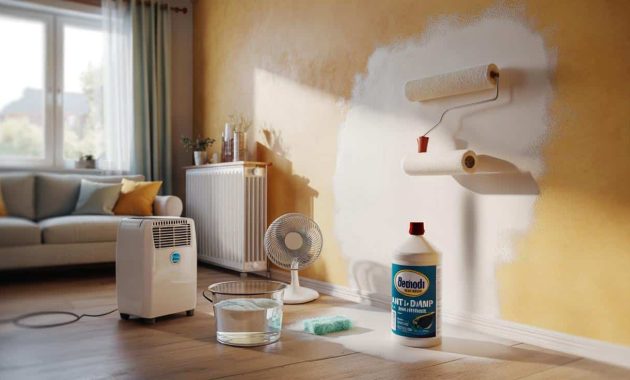
Step one: dry before you clean. Open windows wide, crank up the heating just a bit, and if you can, run a dehumidifier or even a fan for a few hours aimed at the damp zone. The goal is not to “bake” the wall, but to stop feeding the moisture.
Step two: gently wash, without bleach. Painters often use a mixture of warm water and mild soap, or a specialized anti-mold cleaner that’s low in fumes. Soft sponge, circular movements, no angry scrubbing. Then they rinse lightly with clear water and let the area dry completely.
Step three is where the magic really happens: a dedicated **anti-damp primer**. Not just any primer, not the leftover pot from another room. A specific insulating or anti-humidity undercoat, the one pros use before repainting cellars or old stone walls. Applied generously with a roller, sometimes in two thin coats, it creates a kind of barrier that stops stains from coming back through.
Only once this coat is fully dry do they repaint with a breathable finish, especially in bathrooms and kitchens. The trick is to let the wall breathe while protecting it from splashes and condensation. And yes, it takes time. Let’s be honest: nobody really does this every single day.
What many people get wrong is this frantic urge to scrub harder, spray stronger, or close the door to “contain the smell.” The painter’s logic is the opposite. Open up. Air out. Slow down the process instead of trying to win in a single evening. Be kind to the wall and to your lungs at the same time.
A Paris-based painter summed it up simply: “Bleach is a punishment. Damp needs a solution. I’d rather open a window and let the wall recover than gas a family for a quick before-and-after photo.”
- Let the wall dry fully between each step, even if it takes 24–48 hours.
- Use a mild cleaner or low-odor anti-mold product instead of ammonia or neat bleach.
- Invest in a true **anti-damp primer** rather than yet another “miracle spray.”
- Improve everyday airflow: open windows, clean vents, avoid drying laundry in closed rooms.
- Watch corners, behind furniture, and around radiators: the first warning signs always start there.
Living with your walls, not against them
There’s something strangely intimate about damp. It reveals how we really live in our homes: the steamy morning showers, the laundry hung up “just for tonight,” the bedroom windows that stay closed all winter because the street is too noisy. No bleach bottle can erase that.
Once you see damp as a conversation instead of a failure, the painter’s method starts to feel almost obvious. Dry first. Clean softly. Protect intelligently. Then change one or two small habits: door left ajar after a shower, window opened ten minutes a day, radiator not blocked by a huge piece of furniture.
We’ve all been there, that moment when you spot a new stain and feel a little wave of shame. The truth is, most homes have at least one stubborn patch. Some people will keep fighting it with burning smells and headaches. Others will quietly switch to the slower, calmer, painter-approved routine and notice, a few months later, that the stain simply… hasn’t come back. That’s the real victory.
| Key point | Detail | Value for the reader |
|---|---|---|
| Dry before cleaning | Ventilate, use a fan or dehumidifier, and break the moisture cycle first | Attacks the root cause of damp, not just the visible stain |
| Gentle cleaning, no harsh fumes | Warm water, mild soap or low-odor anti-mold product, soft sponge | Protects health, preserves plaster and paint, avoids toxic atmosphere |
| Use anti-damp primer and better habits | Apply a specialized undercoat and improve daily airflow and ventilation | Long-term protection, fewer recurring stains, cleaner and healthier home |
FAQ:
- Question 1Can I still use a bit of diluted bleach if the mold is very dark?Yes, diluted bleach can be used in very small doses on tough mold, but always with windows wide open and never as the only “solution.” Rinse well, let it dry fully, then follow up with an anti-damp primer so the stain doesn’t reappear.
- Question 2What if the damp patch keeps growing even after I ventilate and repaint?This can signal a deeper problem: leaking pipe, roof issue, or rising damp from the ground. At that point, you need a plumber, roofer, or building expert, not just paint. A painter can usually tell you if the moisture looks structural.
- Question 3Is anti-damp paint enough on its own?Anti-damp or anti-mold paint helps, but the key layer is often the dedicated primer underneath. Think of the primer as the shield and the paint as the clothes. You need both, and you still need airflow and reasonable humidity levels in the room.
- Question 4How long should I let the wall dry between steps?Most pros wait at least 24 hours between washing and priming, and another 12–24 hours before painting, depending on temperature and humidity. If the wall still feels cold and clammy to the touch, it’s not ready yet.
- Question 5Do dehumidifiers really help with damp walls?Yes, especially in small, poorly ventilated rooms. A dehumidifier won’t repair a leak, but it lowers the moisture in the air, so the wall absorbs less water and your anti-damp treatment lasts much longer.