Most of us scrub the front of the oven, sigh at the streaks on the glass, then give up on the brownish haze trapped between the panes. Yet many modern ovens quietly hide a trick feature, designed by engineers but barely mentioned in manuals, that makes thorough cleaning surprisingly simple.
The messiest appliance in the kitchen
Roast chicken, bubbling lasagne, cheesy pizza and weekend cakes all have one point in common: they leave your oven filthy. Fat spits, sauces overflow, sugar caramelises. Over weeks, that mist on the glass turns into a sticky film you can barely see through.
Most people postpone oven cleaning as long as possible. Some tackle it once a month, others only when smoke sets off the alarm. The longer you wait, the more the stains harden. High heat repeatedly bakes residues into a crust that clings to metal and glass.
This is not just a cosmetic problem. Burnt food particles can release unpleasant fumes, and layers of grease can attract bacteria when the oven is cold. A dirty door also makes it harder to monitor cooking, which leads to overcooked or undercooked dishes.
Regularly cleaned oven glass reduces smells, improves visibility and cuts the risk of breathing in fumes from burnt residues.
Why oven glass is such a nightmare to clean
The door on many ovens is made of two or even three sheets of glass, separated by air gaps. This design keeps the exterior cooler and improves energy efficiency, but it creates a practical headache.
Grease splashes and steam find their way into tiny gaps at the edges of the door. Over time, they creep between the panes. From the outside, you see a ghostly fog or strange streaks that no sponge can reach.
That’s when most people assume their oven is ruined or that only a professional cleaning service can fix it. In reality, the answer is often much simpler: the door is designed to come apart.
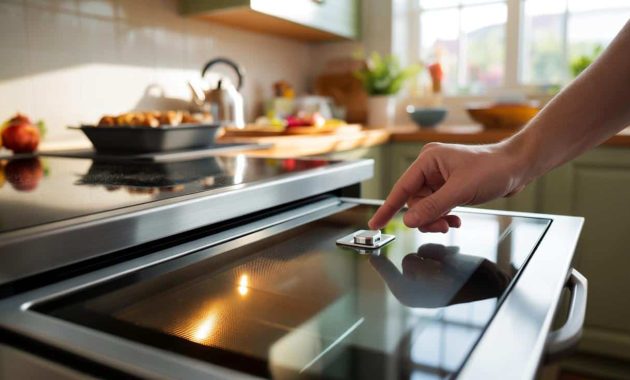
The little-known button hiding on your oven
Many recent ovens are fitted with a discreet release system that lets you remove the door, and sometimes just the glass, without any tools. Manufacturers rarely advertise it on the front of the appliance. It may receive one vague line in the manual, buried among technical warnings.
➡️ Probably F15s, F16s, F22s And F35s : Dozens Of US Jets Now Converging On The Middle East
➡️ The pantry mixture that brings burnt baking trays back to life with minimal scrubbing
➡️ She adds a natural essence to the rinse cycle and strangers ask what perfume she uses
➡️ I realized cleaning wasn’t the problem, my system was
➡️ No vinegar and no baking soda: the half-glass trick that cleans the drain by itself
The key element is usually a small button, latch or sliding tab near the hinges. On some models, it sits at the base of the door. On others, there are two small buttons at the top edge. You need to open the door fully to spot them.
That “mystery” button near the hinges is often a built-in safety release allowing you to lift off the oven door for a deep clean.
How to check if your oven has the hidden release
- Grab the user manual or look up the model number online.
- Open the oven door fully, so it lies as flat as possible.
- Inspect the hinge area on both sides for clips, small levers or buttons.
- Check the top edge of the door for two small push buttons or tabs.
- Look for subtle symbols showing a padlock, arrow or “open” icon.
If you locate a mechanism, the manual will usually show how to unlock it safely. Some doors simply lift up once the hinge locks are released. Others need a slight pull or tilt at a particular angle.
Step-by-step: removing the oven door safely
Once you have identified the system on your appliance, the process is surprisingly quick. Plan 10 to 15 minutes for your first attempt.
1. Prepare the area
Turn the oven off and let it cool completely. Place a thick towel on the floor in front of the cooker. This protects the glass and your tiles if you accidentally knock the door.
Clear nearby surfaces so you have somewhere to rest the door flat. The glass is tougher than it looks, but dropping it from height can still crack it.
2. Unlock the mechanism
Fully open the door. At the hinges, you may see a small metal flap: flick it up or outwards to unlock the hinge. With button-style systems, press and hold as instructed by the manual.
On some models, you only need to remove the top trim. Look at the upper edge of the door: if there are two small buttons, one at each corner, press them. The narrow metal or plastic strip should come free, letting you slide the glass panels out.
If your model allows it, you can clean just the glass with the door still attached, by removing the top bar and sliding the panes towards you.
3. Lift off the door
Once the hinges are unlocked, gently close the door until it reaches a half-open angle. Then lift upwards firmly but calmly. The door should come away from the hinges.
Place it flat on the protected surface, glass side up. If the glass panels are removable, slide them out one by one, noting their order and which side faces inwards.
Cleaning the glass without harsh chemicals
With the glass freed from its frame, that stubborn brown haze suddenly looks much less intimidating. You no longer have to twist your wrist into awkward angles inside a hot metal box.
Many specialists advise skipping aggressive commercial oven sprays for the glass sections. Gentler household ingredients can work just as well and are kinder to the seals and coatings.
| Product | How to use it | Main benefit |
|---|---|---|
| Bicarbonate of soda | Mix with water into a paste, spread, leave 15–30 minutes, then wipe | Breaks down burnt-on grease |
| Black soap | Apply with a sponge, scrub gently, rinse well | Strong natural degreaser |
| Lemon juice | Rub on with a cloth, particularly on fresh stains | Deodorises and cuts light grease |
| White vinegar | Spray diluted, leave for a few minutes, then wipe dry | Removes streaks and limescale marks |
For a thick layer of grime, start with a bicarbonate paste. Spread it evenly, leave it to work, then wipe with a soft cloth. A plastic scraper can help loosen heavy deposits without scratching the glass.
Finish with white vinegar on a microfibre cloth to remove any remaining film and restore transparency. Make sure everything is fully dry before reassembling the door.
Reassembling the door: details that matter
When the glass shines again, slide each pane back in the right order. Many panels have a slightly rough side and a smooth side. Put them back exactly as you found them, as this can affect heat resistance and reflections.
Refit the top trim or bar, pressing until you hear a clear click. Then reconnect the door to the hinges, following the same angle you used when removing it. Lock the hinge flaps back into their original position so the door cannot jump off during normal use.
Before switching the oven on, gently open and close the door several times. It should move smoothly with no wobbling or grinding.
Health and safety angles people overlook
A thick layer of grease on the inside of the door can catch and burn at high temperatures. This produces smoke that irritates the throat and eyes, especially in small kitchens with weak ventilation. Families with children, asthma sufferers or pets are particularly sensitive to repeated smoke exposure.
A clean door also reduces the temptation to open the oven repeatedly “just to check” on food you cannot see properly. Fewer door openings mean a more stable temperature, shorter cooking times and less wasted energy.
How often should you use that hidden button?
For heavy oven users, a full glass clean every one to two months keeps build-up manageable. Light users can stretch that to once a season. The key is consistency: shorter, more frequent sessions are far easier than an annual deep clean.
Think of it as part of a routine with other quiet maintenance tasks: descaling the kettle, clearing the fridge shelves, flushing the dishwasher filter. None take long when tackled before dirt has a chance to harden.
Real-life scenarios where this trick helps
Picture a Sunday roast where the tray spits fat against the glass. If you wipe the door once it cools and plan a quick removal of the glass that week, the stains lift easily. Leave them for three months and you could be scraping blackened fat for an hour.
For renters, mastering the hidden button can also prevent disputes at the end of a tenancy. Letting agents often photograph greasy, opaque oven doors as proof of “poor cleaning”. A clear, streak-free glass panel tells a very different story.
Small design detail, big daily impact
This tucked-away button or latch is a modest piece of engineering, but it changes how you relate to a key appliance. Instead of dreading oven day, you gain a repeatable method that feels almost satisfying.
Once you know the trick, you stop treating the grime between the panes as inevitable. You see it for what it is: a fixable problem, solved with one click, a few household ingredients and a little bit of patience.